How to make visitor counter using Arduino Uno
by Khaled Magdy In this tutorial, we'll discuss Arduino Counter Timer Mode from the very basic concepts all the way to implementing Arduino Counter Timer Mode applications. We'll start off by discussing what is a timer, how it works, what are different timer operating modes, and the working principles of Arduino timers in counter mode.

Coin Sorter & Counter (Arduino Uno) 10 Steps Instructables
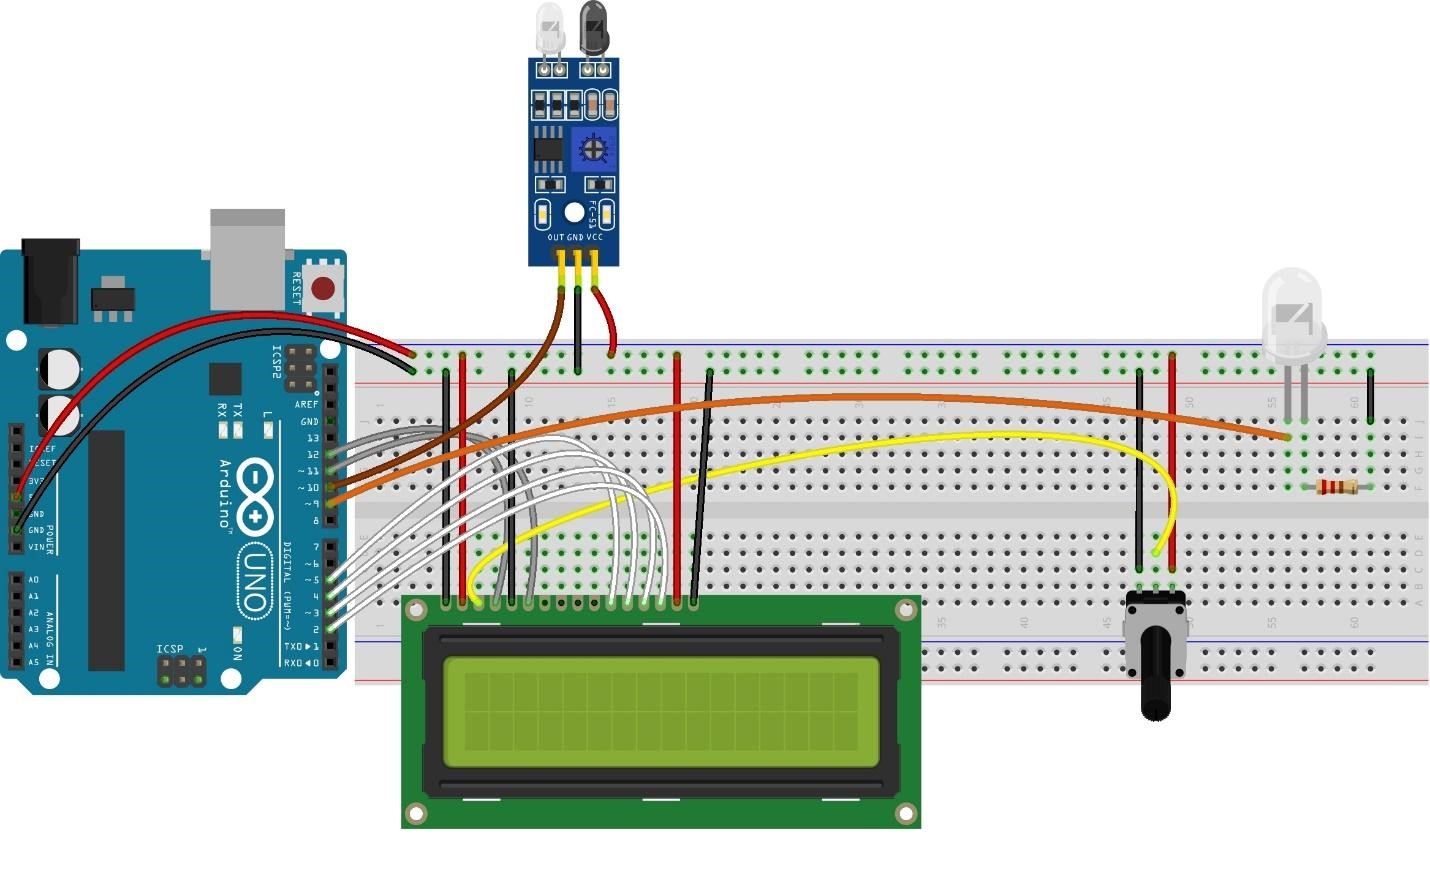
counter using ir sensor Circuit Diagram Please make the circuit according to the given diagram. Connect the 5-volts pin of the Arduino with the VCC pin of the IR sensor and also with the LCD display module. Attach the GND pin of the Arduino to the GND pin of the IR sensor and also with the LCD display module.

Bidirectional visitor counter using arduino uno and 16*2 lcd display YouTube
The circuit Connections for the following project are as shown in the circuit diagram. Connect VCC pin of both IR sensors to 5V pin of Arduino Uno. Connect GND pin of both IR sensors to GND pin of Arduino Uno. Finally, Connect DATA pins of both IR sensors to Arduino pins 7 and 8 respectively. int irPin1=7; int irPin2=8;

Arduino Uno Counter 5 Steps Instructables
330 ohm resistor 10k ohm variable resistor or potentiometer Breadboard Jumper wires Arduino frequency counter circuit: Project circuit diagram is shown below. The 16×2 LCD screen (2 rows and 16 columns) is used to display the values of frequency and period of the input voltage where: RS —> Arduino digital pin 2 E —> Arduino digital pin 3

DEMO Seven segment Counter UP using push button with Arduino UNO YouTube
11 1 2 why don't you just count a variable from 0 to 0x0F and decide the four bits into the LED outputs?. the code would be simple and not repetitive - jsotola Feb 11, 2021 at 7:45 if (buttonState == HIGH) means "as long as the button is pressed". You probably want to use a flag that changes, when the button is clicked. - PMF

Membuat Counter P10 Menggunakan Arduino Uno Dicky B_Mz
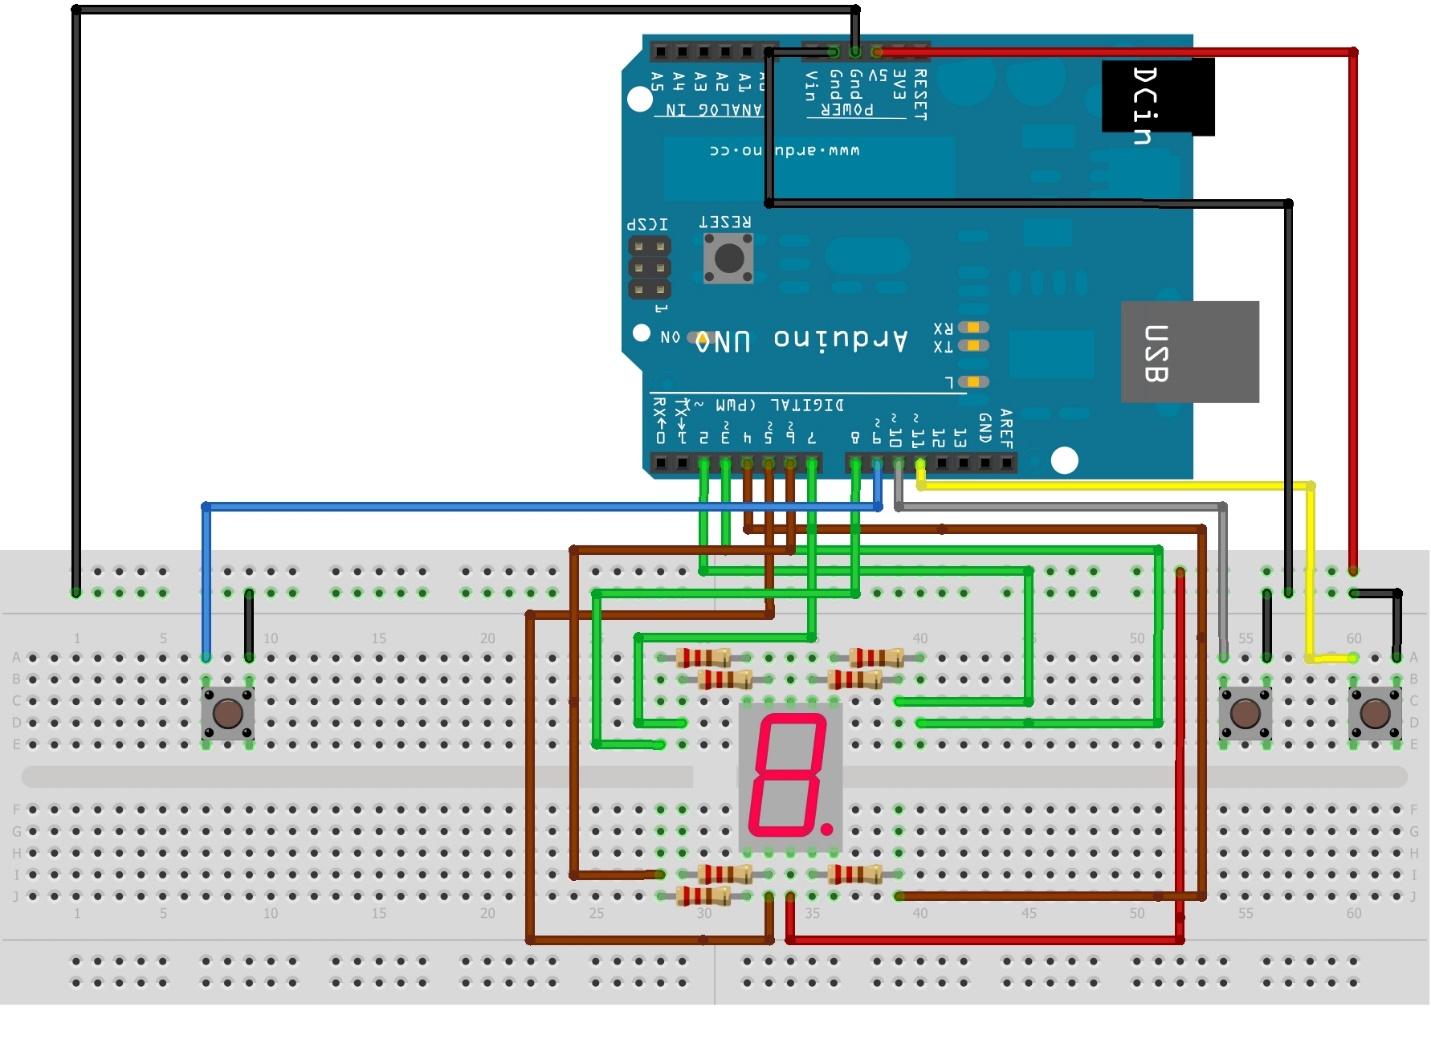
Code for Digital CounterConnect the GND of Arduino with the pin of all the push buttons by using a breadboard such that each push button completes the circuit when you press it. Now attach the other pin of the UP push button with the analog-0 pin of the Arduino. Join the other pin of the DOWN push button with the analog-1 pin of the Arduino.

Arduino Counter with LCD display and Push button Tutorial YouTube
Mate to an Arduino Uno compatible board. Choose one of the basic example Arduino sketches and download it from here. Upload example sketch to your Arduino. If 1-4 went correctly, your display should now be counting upwards. Continue reading the Example coding sections of this tutorial to get a better grasp of the code.
How to make digital counter using 7 segment with Arduino Uno
creating a counter Using Arduino system June 6, 2014, 7:57pm 1 Hi folks, Im kinda new to this and hoping someone can help me. I'm a Secondary school Technology Teacher and upgrading our programmable control software from P Basic Stamp controllers to Arduino and trying to write a book for the pupils to work through.
Digital Counter using Arduino UNO Arduino Project Hub
The course will also cover programming the Arduino using C code and accessing the pins on the board via the software to control external devices. Please note that this course does not include discussion forums. Upon completing this course, you will be able to: 1. Outline the composition of the Arduino development board 2.

Arduino based Digital Counter with LCD display and Push butt Arduino Project Hub
Step 1: 1 build a simple arduino lcd counter using simple components such as push buttons and LCD The parts list Arduino Uno 16x2 LCD Push Buttons Potentiometer 100k 10k Resistor 220R Resistor Breadboard Connecting Wires Ask Question Step 2: Circuit Ask Question Comment Step 3: Code Ask Question Be the First to Share Did you make this project?
Counter arduino uno
Step 1: The Idea Description of Idea: Mechanical coin sorters are by no means a new idea. Most sorters separate coins based on diameter. Coins roll along or slide down a ramp that has differently sized slots cut into it. Going from the top of the ramp to the bottom, the slots get progressively larger.

Part 2 Working 4 Digit UP counter module using Arduino Uno YouTube
1. Arduino Hardware Timers Arduino UNO (Atemga328p) has 3 hardware timers which are: Timer0: 8-Bit timer Timer1: 16-Bit timer Timer2: 8-Bit timer

Seven Segment Display Counter with Arduino Uno Prgmine
Step 1: Build Your Circuit Attached is a schematic view of the circuit that we will be using. For demonstration, I have built a 5-bit counter. You should assemble this circuit on a protoboard and attach to your Arduino. Ask Question Step 2: Understanding the Circuit This circuit is going to have 1 input and 5 outputs to the Arduino board.

Arduino UNO 4 bit counter YouTube
In Arduino Uno it takes 1/16000000 seconds or 62nano seconds to make a single count. Meaning Arduino moves from one instruction to another instruction for every 62 nano second. Timers in Arduino UNO: In Arduino UNO there are three timers used for different functions. Timer0:

7 Segment 2 Digit and 10 pins Counter 0099 with Arduino UNO EDIYs
There are three counter registers in Arduino Uno, namely, Timer0, Timer1, and Timer2. Timer0 and timer2 are 8 bit timers, meaning they can store a maximum counter value of 255. Timer1 is a 16 bit timer, meaning it can store a maximum counter value of 65535. Once a counter reaches its maximum, it will tick back to zero (this is called overflow).

4 Digits 7 Segments Counter 00009999 with Arduino UNO, Short Proprogramming function etronicskh
Bidirectional Counter Working. Working of a Bidirectional counter is very simple. first of all, we should refer to the components list to understand the working of each of the components. so first we would like to point to the sensor. we are using the IR sensor here to detect the presence of any person in front of the sensor. like if anyone.